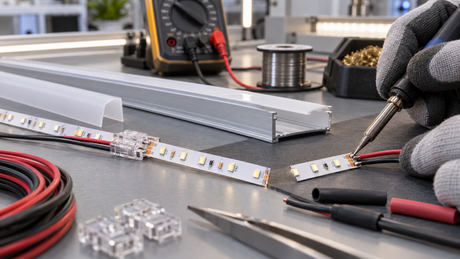
Short answer: choose top-bend LED neon flex when the installation path curves up and down relative to the light-emitting surface. Choose side-bend LED neon flex when the path curves left and right on the mounting plane. The correct choice depends on the project drawing, not only on the appearance of the sample.
Buyer’s rule: draw the intended lighting line, mark the visible light-emitting face, and show the direction of every curve. A supplier can then confirm whether the project needs top bend, side bend, or a multi-directional solution.
The terms describe the direction in which the silicone neon profile is designed to flex. They do not simply describe where the product is installed.
A top-bend profile normally bends in the same plane as a conventional flat LED strip: it follows an up-and-down curve while the illuminated surface remains visible from the front. A side-bend profile bends laterally, allowing the light line to turn left and right across a flat mounting plane.
Trying to force a neon flex in the wrong direction can produce uneven curves, stress the internal circuit, damage the silicone, or create bright and dark sections. Always follow the model-specific minimum bending radius and installation instructions.
| Selection point | Top-bend neon flex | Side-bend neon flex |
|---|---|---|
| Main bend direction | Up and down relative to the emitting face | Left and right across the mounting plane |
| Typical visual path | Arches, vertical contours, coves and changes in elevation | Letters, logos, plan-view curves and façade outlines |
| Drawing to provide | Side elevation or section showing vertical curves | Front elevation or plan showing horizontal curves |
| Common risk | Twisting the product to make a lateral turn | Forcing the product over an up-and-down contour |
Top-bend neon flex is often considered when the light line follows vertical architectural contours. Examples include ceiling coves, arches, curved wall details, landscape edges, step features, and linear outlines that change height.
It can also be suitable when the designer wants the illuminated face to remain oriented toward the viewer while the body bends forward and backward along the installation path. The mounting channel or clips must support the intended curve without creating local pressure points.
Side-bend neon flex is frequently selected for shapes viewed from the front, such as channel letters, logos, decorative graphics, circular outlines, curved retail displays, and building contours that turn left and right.
For signage and graphic lines, side bend can make it easier to reproduce a two-dimensional path on a wall or panel. However, tight corners must still respect the specified bending radius. A sharp corner in a drawing may require a larger radius, a joint, a separate segment, or another profile.
Send the drawing with arrows showing both the emitting direction and the bend direction. Confirm the minimum bending radius for the exact profile. Never assume that two profiles with similar external dimensions bend in the same way.
Check the neon width and height against the mounting channel, groove, sign box, cove, or façade detail. Include tolerance for connectors, end caps, cable exits, and waterproof sealing.
Low-voltage neon flex systems must be planned around voltage drop, wattage per metre, cable size, driver capacity, feed position and total run length. Longer continuous lines may need additional feeds or project-specific wiring. For a detailed voltage comparison, read our guide: 12V vs 24V LED Strip Lights for Commercial Projects.
Define the required colour temperature or colour system, brightness target, dimming method and control protocol. If the neon is used for a brand colour, signage sample or hospitality interior, approve a physical sample before production because perceived colour can change with the silicone diffuser and viewing environment.
State whether the project is indoor, outdoor, exposed to rain, close to salt air, cleaned with chemicals, or installed in a high-temperature location. Confirm the required ingress-protection level for the complete assembly, including the cable entry, end caps, joints and field-cut sections. Do not treat a product-level IP rating as automatic approval for underwater or chemically aggressive use.
Provide a plan, elevation or section with dimensions.
Mark the visible light-emitting face.
Mark every bend direction and the smallest curve radius.
State indoor or outdoor use and any water exposure.
Specify total length, individual segment lengths and cut points.
Show cable outlet direction and cable length.
Define voltage, power-feed positions and control requirements.
Confirm mounting channel, clips or recessed groove dimensions.
Request a sample or pre-production section when colour and uniformity are critical.
A coiled product photo does not show how the neon should bend after installation. Always use a profile drawing and a bend-direction diagram.
The illuminated line may fit the drawing while the connector or cable does not fit the available space. Reserve installation clearance at both ends and at every feed point.
Neon flex creates smooth curves, not unlimited sharp corners. Bending below the specified radius can affect appearance and reliability.
Outdoor suitability depends on the complete sealed system and the actual environment. Confirm the selected model, sealing method and installation procedure for the project rather than applying a general claim to an entire product range.
Not as its normal bend direction. Forcing lateral bends may twist or damage the product. Use a side-bend or suitable multi-directional profile when the drawing requires left-right curves.
Side-bend neon flex is often the practical starting point for two-dimensional lettering and logo outlines, but the final choice depends on the emitting face, profile size, curve radius and mounting method.
Top-bend neon flex is commonly considered for up-and-down architectural contours. The section drawing should be reviewed before confirming the profile.
It should not be folded into a sharp corner. Use the specified minimum bend radius, redesign the corner as a curve, or divide the line into engineered sections.
Send the application, drawings, profile dimensions, bend direction, voltage, colour, segment lengths, cable outlets, installation environment, control method and required quantity. If a certification or test report is required, identify the exact target market and model so the relevant documents can be checked.
Explore Leomay’s Silicone Neon Flex range, or send your plan, elevation and section drawings for product-selection support.
<p Short answer: choose top-bend LED neon flex when the installation path curves up and down relative to the light-emitting surface. Choose side-bend LED neon flex when the path curves left and right on the mounting plane. The correct choice depends on the project drawing, not only on the appearance of the sample. Buyer’s rule: draw the intended lighting line, mark the visible light-emitting face, and show the direction of every curve. A supplier can then confirm whether the project needs top bend, side bend, or a multi-directional solution. What Do “Top Bend” and “Side Bend” Mean? The terms describe the direction in which the silicone neon profile is designed to flex. They do not simply describe where the product is installed. A top-bend profile normally bends in the same plane as a conventional flat LED strip: it follows an up-and-down curve while the illuminated surface remains visible from the front. A side-bend profile bends laterally, allowing the light line to turn left and right across a flat mounting plane. Trying to force a neon flex in the wrong direction can produce uneven curves, stress the internal circuit, damage the silicone, or create bright and dark sections. Always follow the model-specific minimum bending radius and installation instructions. Top Bend vs Side Bend LED Neon Flex Selection point Top-bend neon flex Side-bend neon flex Main bend direction Up and down relative to the emitting face Left and right across the mounting plane Typical visual path Arches, vertical contours, coves and changes in elevation Letters, logos, plan-view curves and façade outlines Drawing to provide Side elevation or section showing vertical curves Front elevation or plan showing horizontal curves Common risk Twisting the product to make a lateral turn Forcing the product over an up-and-down contour Where Is Top-Bend LED Neon Flex Commonly Used? Top-bend neon flex is often considered when the light line follows vertical architectural contours. Examples include ceiling coves, arches, curved wall details, landscape edges, step features, and linear outlines that change height. It can also be suitable when the designer wants the illuminated face to remain oriented toward the viewer while the body bends forward and backward along the installation path. The mounting channel or clips must support the intended curve without creating local pressure points. Where Is Side-Bend LED Neon Flex Commonly Used? Side-bend neon flex is frequently selected for shapes viewed from the front, such as channel letters, logos, decorative graphics, circular outlines, curved retail displays, and building contours that turn left and right. For signage and graphic lines, side bend can make it easier to reproduce a two-dimensional path on a wall or panel. However, tight corners must still respect the specified bending radius. A sharp corner in a drawing may require a larger radius, a joint, a separate segment, or another profile. Five Specifications to Confirm Before Ordering 1. Bend Direction and Minimum Bending Radius Send the drawing with arrows showing both the emitting direction and the bend direction. Confirm the minimum bending radius for the exact profile. Never assume that two profiles with similar external dimensions bend in the same way. 2. Profile Size and Installation Space Check the neon width and height against the mounting channel, groove, sign box, cove, or façade detail. Include tolerance for connectors, end caps, cable exits, and waterproof sealing. 3. Voltage and Maximum Run Length Low-voltage neon flex systems must be planned around voltage drop, wattage per metre, cable size, driver capacity, feed position and total run length. Longer continuous lines may need additional feeds or project-specific wiring. For a detailed voltage comparison, read our guide: 12V vs 24V LED Strip Lights for Commercial Projects . 4. Light Output, Colour and Control Define the required colour temperature or colour system, brightness target, dimming method and control protocol. If the neon is used for a brand colour, signage sample or hospitality interior, approve a physical sample before production because perceived colour can change with the silicone diffuser and viewing environment. 5. Environment, Sealing and Cable Outlet State whether the project is indoor, outdoor, exposed to rain, close to salt air, cleaned with chemicals, or installed in a high-temperature location. Confirm the required ingress-protection level for the complete assembly, including the cable entry, end caps, joints and field-cut sections. Do not treat a product-level IP rating as automatic approval for underwater or chemically aggressive use. Application Checklist for Architects and Contractors Provide a plan, elevation or section with dimensions. Mark the visible light-emitting face. Mark every bend direction and the smallest curve radius. State indoor or outdoor use and any water exposure. Specify total length, individual segment lengths and cut points. Show cable outlet direction and cable length. Define voltage, power-feed positions and control requirements. Confirm mounting channel, clips or recessed groove dimensions. Request a sample or pre-production section when colour and uniformity are critical. Common Selection Mistakes Choosing by Product Photo Alone A coiled product photo does not show how the neon should bend after installation. Always use a profile drawing and a bend-direction diagram. Ignoring End Caps and Cable Exits The illuminated line may fit the drawing while the connector or cable does not fit the available space. Reserve installation clearance at both ends and at every feed point. Designing a Corner Tighter Than the Product Allows Neon flex creates smooth curves, not unlimited sharp corners. Bending below the specified radius can affect appearance and reliability. Assuming All Outdoor Versions Are Interchangeable Outdoor suitability depends on the complete sealed system and the actual environment. Confirm the selected model, sealing method and installation procedure for the project rather than applying a general claim to an entire product range. Frequently Asked Questions Can top-bend LED neon flex turn left and right? Not as its normal bend direction. Forcing lateral bends may twist or damage the product. Use a side-bend or suitable multi-directional profile when the drawing requires left-right curves. Which type is better for letters and logos? Side-bend neon flex is often the practical starting point for two-dimensional lettering and logo outlines, but the final choice depends on the emitting face, profile size, curve radius and mounting method. Which type is better for arches and ceiling contours? Top-bend neon flex is commonly considered for up-and-down architectural contours. The section drawing should be reviewed before confirming the profile. Can LED neon flex make a sharp 90-degree corner? It should not be folded into a sharp corner. Use the specified minimum bend radius, redesign the corner as a curve, or divide the line into engineered sections. What information should I send for an OEM/ODM quotation? Send the application, drawings, profile dimensions, bend direction, voltage, colour, segment lengths, cable outlets, installation environment, control method and required quantity. If a certification or test report is required, identify the exact target market and model so the relevant documents can be checked. Need Help Matching Neon Flex to Your Drawing? Explore Leomay’s Silicone Neon Flex range, or send your plan, elevation and section drawings for product-selection support. Request a Project Review